Glazed Christmas Ham
I love the challenge of cooking for a group. Whether it's just another couple, the backyard brewers, or in the case of this past Christmas, a gaggle of English visitors, the undertaking, albeit daunting, is always a thrill.
This was a once in the lifetime Christmas for Zoë. We hosted her parents, aunt & uncle, and brother's family. All in all, ten people for our table of eight and three of the eight had never been to the US.
With a lot of time to plan, we decided fairly early on the main course would consist of ham and turkey. The turkey was a no-brainer. It was hitting the rotisserie. The ham, however, was different.
In years past, I've always had a cured ham. This year I wanted something new, so I opted for a 15 pound fresh ham.

All hams are not created equal….
My fresh ham is really a fresh pork leg, or rather, the uncured rear leg of a hog. The process of dry curing (what I'm not doing) or wet curing/brine (what I am doing) turns the rear leg into a ham. Without the cure, smoking a fresh leg yields what is in essence, a large pork roast.
I ordered my ham from a local farm and had it deboned. Although the bone adds more to the presentation, I wanted to minimize the carving hassle.

Holiday Ham with Brown Sugar Glaze
Adapted from Charcuterie
12 to 15 pound fresh ham
brine
1 gallon water
1 1/2 cups kosher salt
2 cups brown sugar
8 tsp of pink salt
glaze
1 1/2 cups brown sugar
3/4 cup dijon mustard
1 tbsp minced garlic
This recipe is dead simple, but it does require some planning. Notably, refrigerator space to store the ham and brine.
Mix the brine ingredients together in a container large enough to hold the ham. Keep the ham submerged in the brine for 6 to 8 days.

I used a plastic bag from the butcher and then doubled it up with a trash bag.
Since it is the dead of winter here and I refused to empty out the beer fridge, I opted to brine in a cooler.

Our unattached garage is downright frigid, so with the ham packed in a cooler with ice packs, I had no worries sticking this thing outside and keeping it under a safe 40 degrees F. If it was summer, I would have to rethink things.
Since I was feeding the masses, I opted to help out my game by smoking the ham a day before. It was much easier warming up the cooked ham on Christmas, versus trying to correctly time its finish on the grill. So, depending on what your plans are, remove the ham from the fridge/ice chest 24 hours before smoking.
Rinse the ham under cold water and pat dry. Return to the fridge uncovered for 12-24 hours.
On cook day, prep the grill for indirect low (200-225 F) and smoke the ham for 2 hours. For wood, I used hickory.
Meanwhile, mix the glaze ingredients in a bowl.

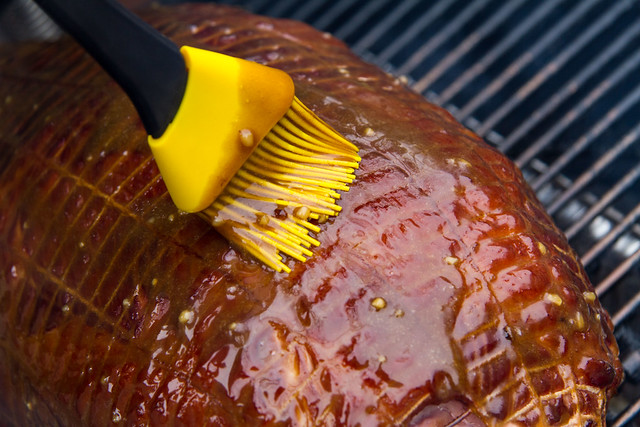
At the two hour mark, apply the glaze to the ham, being sure to save some glaze for later.

Lower the lid and continue to smoke the ham until it reaches an internal temperature of 155 F, about another 3-4 hours.

When the ham is done, remove from the grill and cover with the remaining glaze. Place the ham in the fridge to store.
Since I was smoking a day early, I had a problem with smoking the next day's dinner and having nothing to show for it.

Thankfully, I smoked spareribs to see me through.

On Christmas day, I returned the ham to the Saffire over indirect low to reheat. I'm glad it was just a "reheat", as it made operation turkey so much easier.
Speaking of, the turkey was brined a day in advance.
And then sent to the Summit's Rotisserie to cook.

When the turkey was done, the ham was heated, and then sliced.

Even with all of those English appetites, we had a ton of leftovers, which is good. The next best thing after hot ham and turkey is next day cold ham and turkey sandwiches.
Most importantly, it was great to have the extended family under our roof for the holidays. It was a once in a lifetime Christmas and a little bit of meal timing/planning made it all that more enjoyable.


